
Add Custom Tiles and Pin to the App Launcher in Office 365
September 16, 2015 / / Comments Off on Add Custom Tiles and Pin to the App Launcher in Office 365
2 minute read


The app launcher is where you’ll point to access most Office 365 apps and services, and you probably click on it multiple times a day as you move through your mail, calendar, and other tasks. But did you know you can move the tiles around on the app launcher, and even pin other applications to it?
Administrators can add apps to the My Apps page, which then allows any user to pin to the app launcher. You can view a demonstration of this in the video above, or the steps below.
To add a tile to the My Apps page so it can be pinned to the app launcher:
- From the admin center, select Company Profile.
- Choose Custom Tiles.
- Click the + icon to open the Add or edit a custom tile window.
- Enter a Name, URL, Description, and Image URL. The name will appear on the tile, and the description will be shown when you select the tile from the My apps page to pin to the launcher. The URL is the location where users will go when they select the tile. If you want to direct users to a SharePoint site, copy the URL here; the format may appear like https://<company_name>.sharepoint.com. The Image URL, according to Microsoft, “The image should be 50×50 pixels, stored in SharePoint Online, and shared with everyone. You can, for example, put it in a library on your team site then generate an anonymous guest link and use that as the URL. If you can’t generate an anonymous link, make sure external sharing is enabled in SharePoint Online.”
- Click Submit.
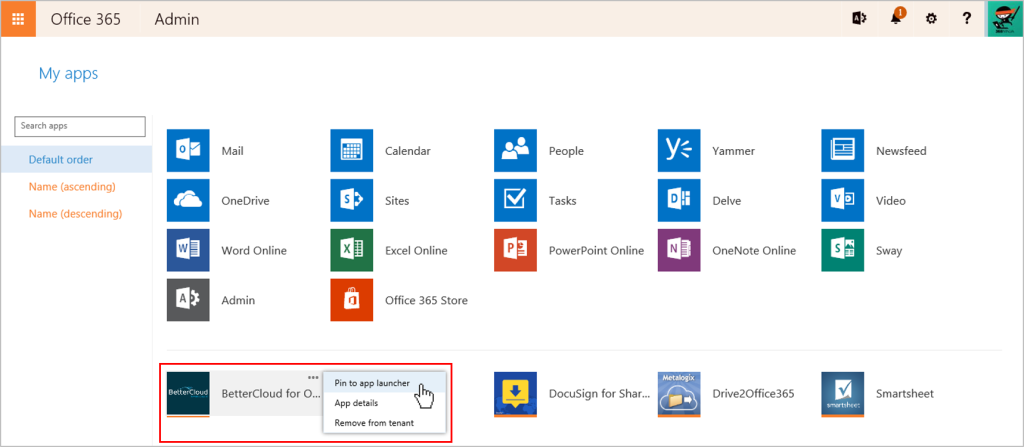
To pin a tile to the app launcher:
- Select the app launcher and click the My apps link.
- Choose the tile/app to add, and click the …
- Click Pin to app launcher.
Pinning apps to the launcher is a great way to keep the processes you use regularly at your fingertips.


