
5 Helpful Tips for Teaching with G Suite
4 minute read

It looks like it’s already that time again! Schools are already well into their second semester of the year, which means it’s time to start planning for next year.
As a teacher, your planning certainly isn’t limited to only creating lesson plans (which is already stressful enough) or designing your new classroom. You also have to take time to become familiar with the technology you’ll be using every day. With everything else that accompanies the preparation for a new school year, learning the technology you’ll be interacting with should be the least of your concerns.
It can be exhausting to try and keep up with the constant updates released each year, so let’s take a look at some tips from fellow G Suite for Education enthusiasts. After searching through some G Suite for Education Google+ communities, we were able to conjure up a few tips and tricks we hope you find helpful for the coming school year.
Tip 1: Need a more functional view in your Gmail inbox? Check out this feature
Gmail has a feature that allows you to preview an email while simultaneously browsing the rest of your inbox. This feature is called the Preview Pane and it’s proven very useful. The best part about it? It takes less than a minute to set up, and we’ll show you how.
- First, open your Gmail inbox and click on the cog button in the upper-right hand corner of your screen.
- Then click “Settings” and select “Labs.”

- Scroll down until you see the option for “Preview Pane.”
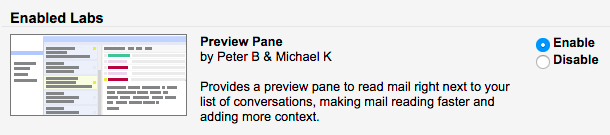
- Click “Enable” and then scroll down the page and select “Save Changes.”
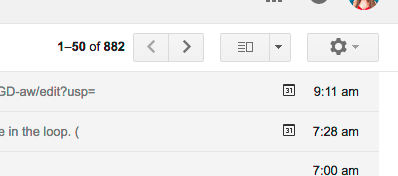
- You can then return to your inbox, where you’ll notice a new button for this function. It will look like this:
- This button allows you to toggle between the different settings in the Preview Pane. Your options will be:
- “No Split” which is your normal Gmail inbox
- “Vertical Split”
- “Horizontal Split”
These are dependent on your preference, so feel free to experiment.
Tip 2: Language professors, this tip is for you
If you’re looking to quickly translate a piece of content for your classes, Google Docs has got you covered. Google Translate works in your document just as it would in a Google Translate search.
Here’s a quick way to set up this feature:
- Open a Google Doc.
- On the top menu, select “Tools” and then select “Translate document.”
- A small box like this will appear:

- Select which language you’d like to translate the document to, and then click “Translate.”
- All finished!
Tip 3: Transferring the ownership of a Google Doc is officially possible
Need to transfer the ownership of your Google Docs to another teacher? All it takes is just a few simple steps.
- In Google Docs, click the “Share” button, and then click “Advanced.”
- Next to the user you want to transfer ownership to, click the drop-down arrow and change to “Is Owner.”
- Click “Save Changes,” and then “Done.”
By following these easy steps, your Google Doc has a new owner. Simple as that!
Tip 4: Need an interactive map? Google Maps to the rescue
Everyone knows Google Maps is great for directions or virtually traveling the world, but what about educational purposes? Maps offers a great feature that allows you to map out a period of time or tell a story. This could be used for geography, literature, or history courses alike.
To learn how you can do this yourself, check out this helpful video from The Techy Coach Blog to pick up some tips on how you can implement this in the classroom.
Tip 5: Want a more approachable way for students to ask questions? Google Slides has what you’re looking for
It can be difficult for shy students to muster up the courage to ask questions, especially in front of the entire classroom. By enabling students to virtually submit questions that pop up during the presentation, this Google Slides update gives even the shyest of pupils a shot at having their questions answered.
To access this awesome feature, follow these steps:
- Open your Google Slides presentation.
- Click the drop-down menu next to the “Present” button.
- Click the “Presenter” view.
- In audience tools, click “Start new.”
- Share the link with your audience.
- Toggle the slider to “On” to accept questions from your audience.
With that, you’re ready to go! This update is a great way to create an inclusive environment and facilitate easy classroom involvement. If you’d like to learn more about this feature, check out this video.
And there you have it! Now that you have these awesome updates under your belt, don’t forget to try them out. As cumbersome as staying updated with technology can be, we hope that this has helped you get a jumpstart in preparing for the 2017-2018 school year.
While we know tips to help your manage your G Suite account are always useful, keeping your G Suite data secure should also be top of mind. Ransomware is an evolving cyberthreat, and schools and universities are often targeted because of the sheer volume of data that is shared via the cloud each day. To better secure your data and learn about ransomware recovery options, check out “Ransomware and G Suite for Education: What You Need to Know.”


