Everything You Need To Know In Google Classroom (Part 1)
3 minute read

I get lots of emails asking about Google Classroom. Oftentimes I can’t provide adequate answers to these inquiries given my limited experience with the platform. Although I educate my newsletter subscribers and the readers of this site on all things Google Apps, I have never had the task of actually managing a classroom full of students.
Luckily, a reader of the site and real-life teacher was kind enough to help me put a lot of these Classroom dilemmas to rest by putting together a massive guide on everything you need to know in Google Classroom. The guide is too long to fit into a single post so I will be releasing sections on a weekly basis. I am excited to present the first part of this guide, which will take you through everything from first log in to creating classes and inviting students to those classes. If you are new to Google Classroom or are thinking of trying it out, this is definitely worth reading between class periods.
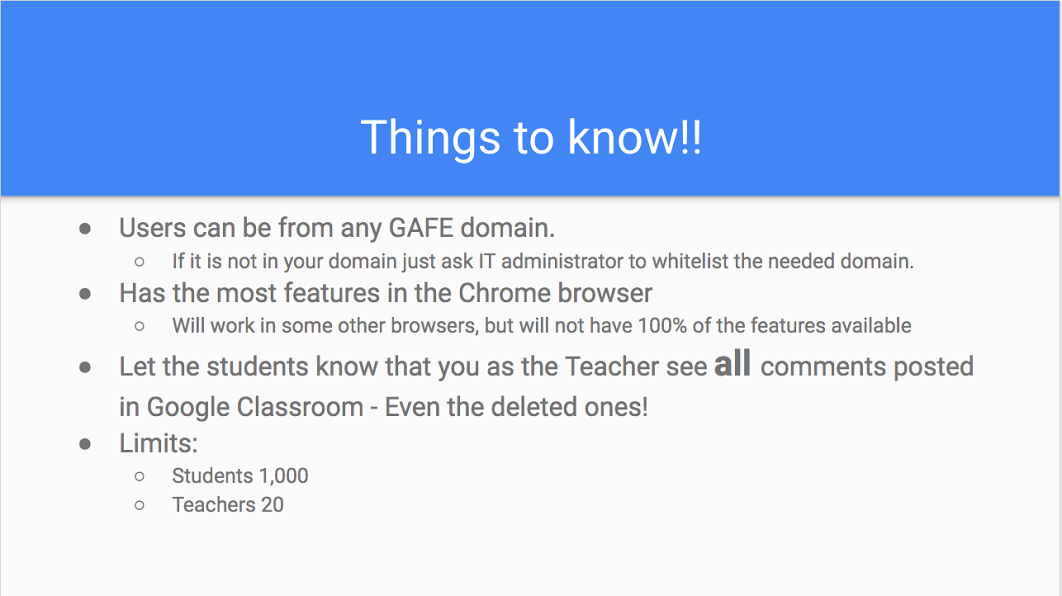
1. Getting Started
Here is some information to keep in mind before starting in Google Classroom.
2. Logging you and your students in for the first time
This step is not lengthy, but it is very important.
Go to: classroom.google.com
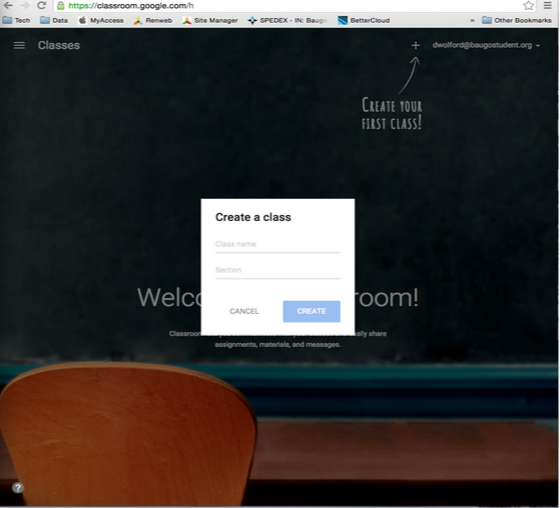
You will see this screen:
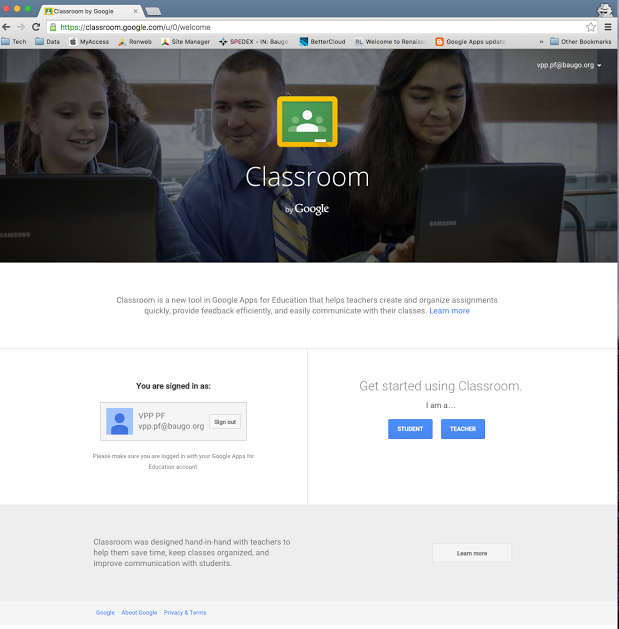
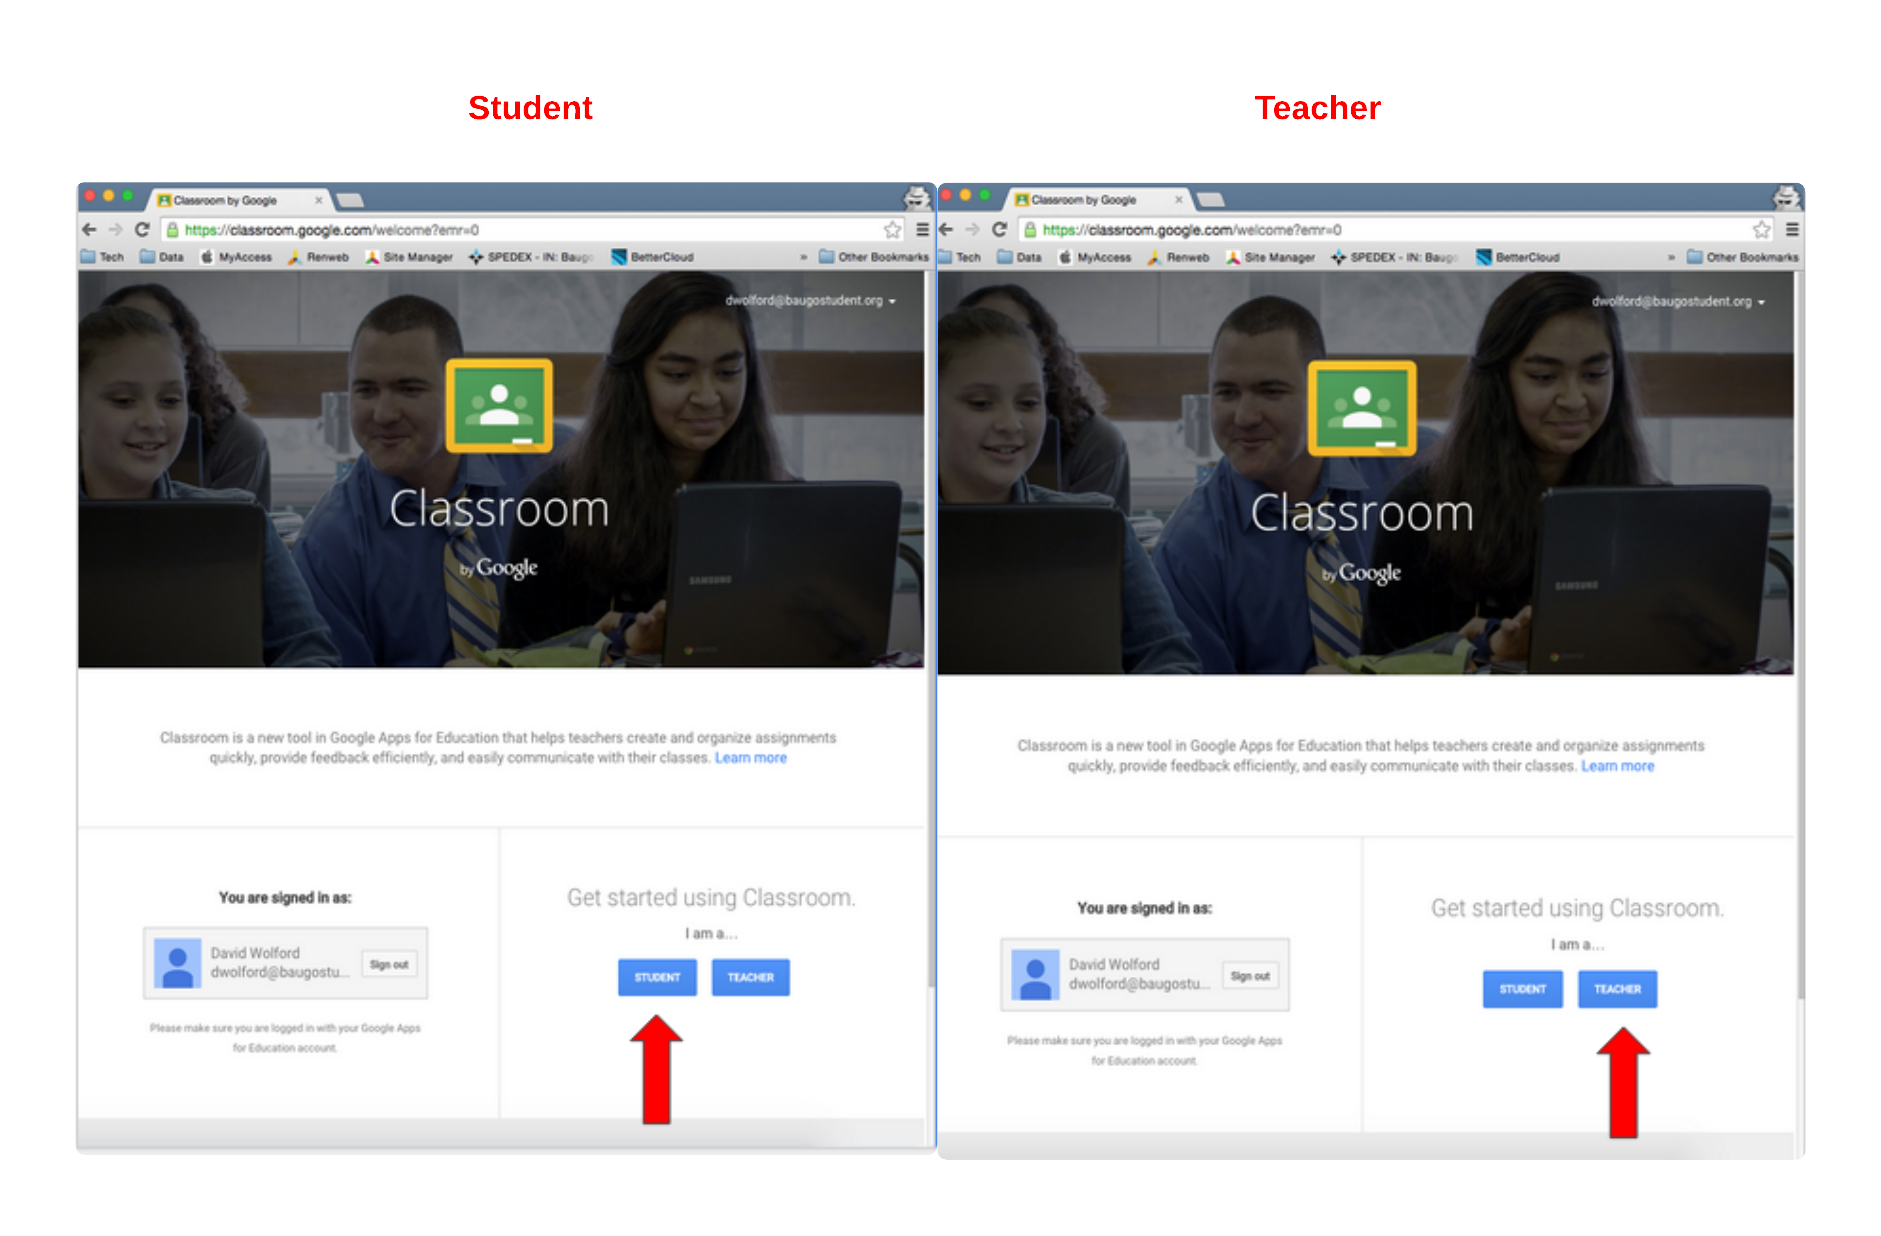
When the teacher or the student logs into Google Classroom for the first time make sure you login with the appropriate role of student or teacher. It will cause a lot of headaches for your IT department if this is done incorrectly.
 3. Creating a Class
Once you are signed in as a teacher you can now create your class. Click on the + button in the upper right hand corner of your screen as seen below.

You will then see a box pop up in the middle of the screen. This is where you add the class name and the section. An example would be: Class name: 10th Grade English, Section: 3rd hour
4. About tab in Classroom
This is where you set up the details of your classroom.
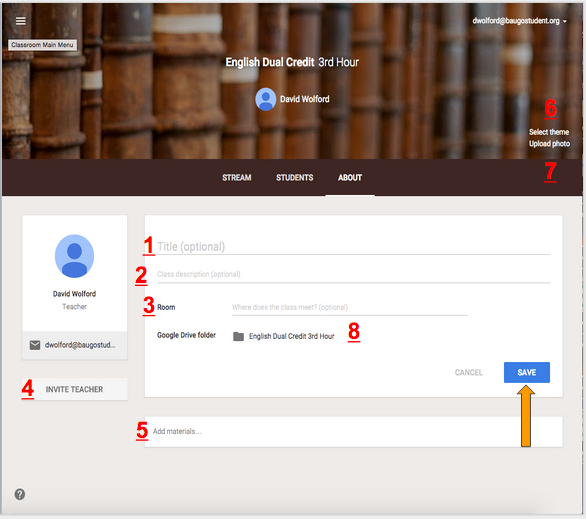
1. Class Title
2. Class Description
a. Could be the hour or any random details you want them to know.
3. Room Location
4. Invite Teacher
a. This is where you can add a collaborating teacher or add your administrator so they can have access to your classroom.
5. Add materials – You can add any resources you want here.
a. Syllabus
b. Teacher Introduction
c. Classroom rules
d. etc
6. Select the theme – this is where you change the picture in the top section of your Classroom.
7. Upload photo – You can make the background be your own custom photo.
8. Google Drive Folder for this class
a. When you created the class Google automatically put a folder in your Google Drive. The title to that folder is the name of the class. When you post assignments they are added automatically to this folder.
5. Inviting Students to the Class
There are two ways to invite your students.
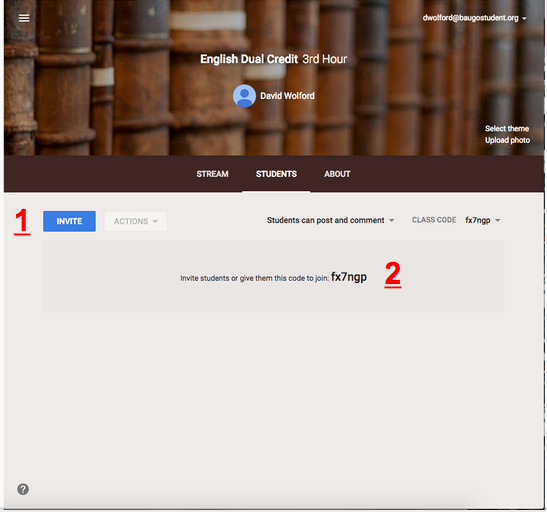
1. Invite Button: In this screen you can enter each student’s email and invite them.
2. Code: Give or display this code for the students to enter when they click on the + button on the main page to join a class. (Same place you created your class.)
To view Part 2 of Everything You Need to Know About Google Classroom CLICK HERE.


 3. Creating a Class