How to add a BetterCloud custom trigger to an existing Jira integration
February 3, 2026
5 minute read

BetterCloud Custom Triggers allow IT admins to build more flexible, event-driven automation by triggering workflows from external systems, like Jira, without manual intervention.
Integrating Jira into BetterCloud enables IT teams to track user onboarding and offboarding through Jira tickets, and trigger workflows off of conditions like ticket creation, a ticket being moved to a specific status, and more.
Today we’ll take a deep dive into how to add a Custom Trigger to an existing Jira integration(Jira Service Management and Jira Software). You can set up Custom Triggers in existing Action Only Integrations. If you don’t already have Jira integrated into BetterCloud, see this article for instructions on how to integrate Jira with BetterCloud.
[PRO TIP: Custom Triggers aren’t limited to Jira; they can also be enabled for platforms like Zendesk, Freshservice, and PagerDuty. Read more about custom triggers here.]
Why integrate Jira with BetterCloud?
Integrating Jira with BetterCloud enables IT teams to:
- Automate onboarding and offboarding workflows from Jira tickets
- Trigger workflows when an issue is created, updated, or moved to a specific status
- Pass ticket data (user email, username, department, issue key, etc.) directly into BetterCloud workflows
- Reduce human error by enforcing required data before automation runs
This approach shifts automation earlier in the IT workflow lifecycle, before manual work begins.
Step 1: Create a custom trigger in BetterCloud
Access the integration
Go to Integrations > Installed, find your existing Jira integration, and click Customize.

Navigate to the “Extensions” menu and select “Get Started.”

Select “Create a trigger for Workflows” and then click “Next.”

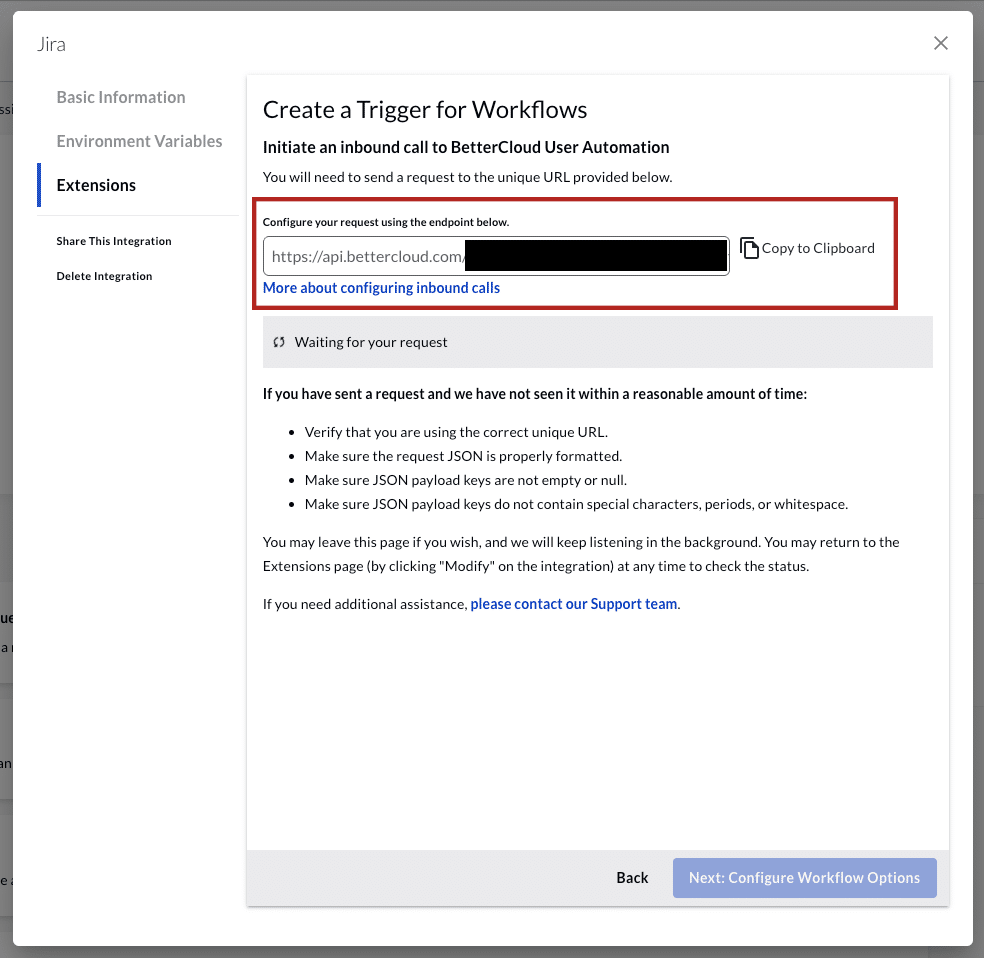
Name your Custom Trigger and optionally give it a description, then click “Next: Inbound Request.”

Important: Copy the Inbound Request URL. You will use this URL when configuring Jira Automation.
Step 2: Configure Jira to call BetterCloud
Create a Jira rule
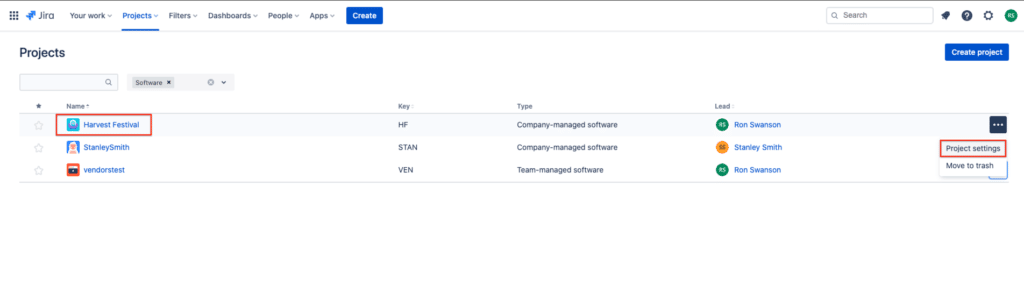
Navigate to the Jira Project you want to trigger the Workflow and navigate to “Automation” under the Project’s Settings.
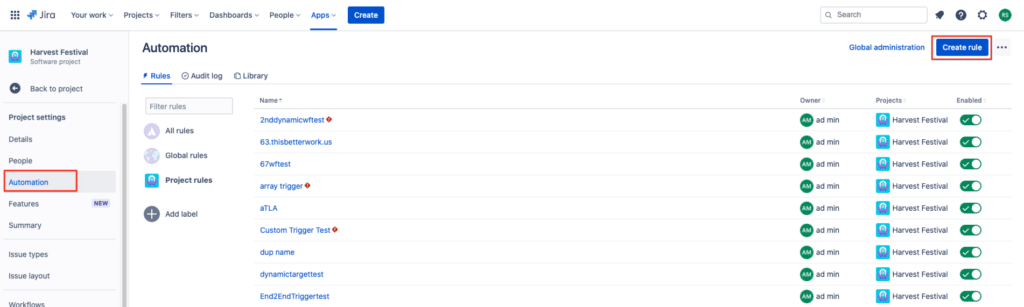
Select the “Automations” tab on the right and create a project rule.
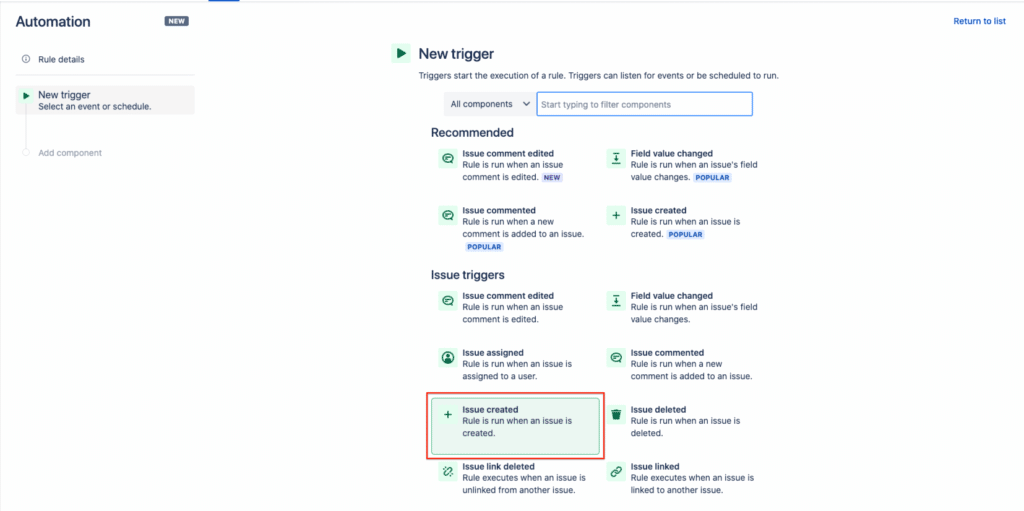
Select the Criteria you want to Trigger your workflow. Common examples include an Issue being created or transitioned to a new status. For this example, we will choose “Issue Created” and click “Save.”
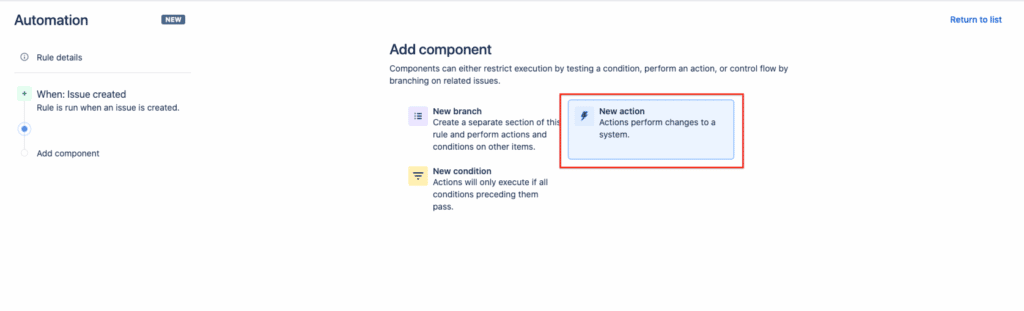
Under the “Add Component” menu, select “New Action.”
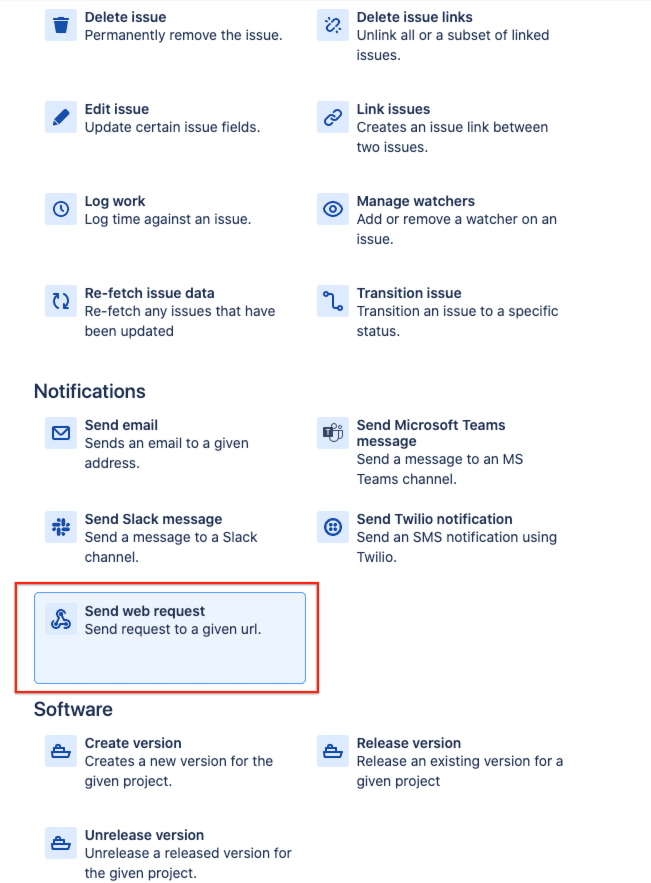
Scroll down to the Notifications section and select “Send Web Request” as the action type.
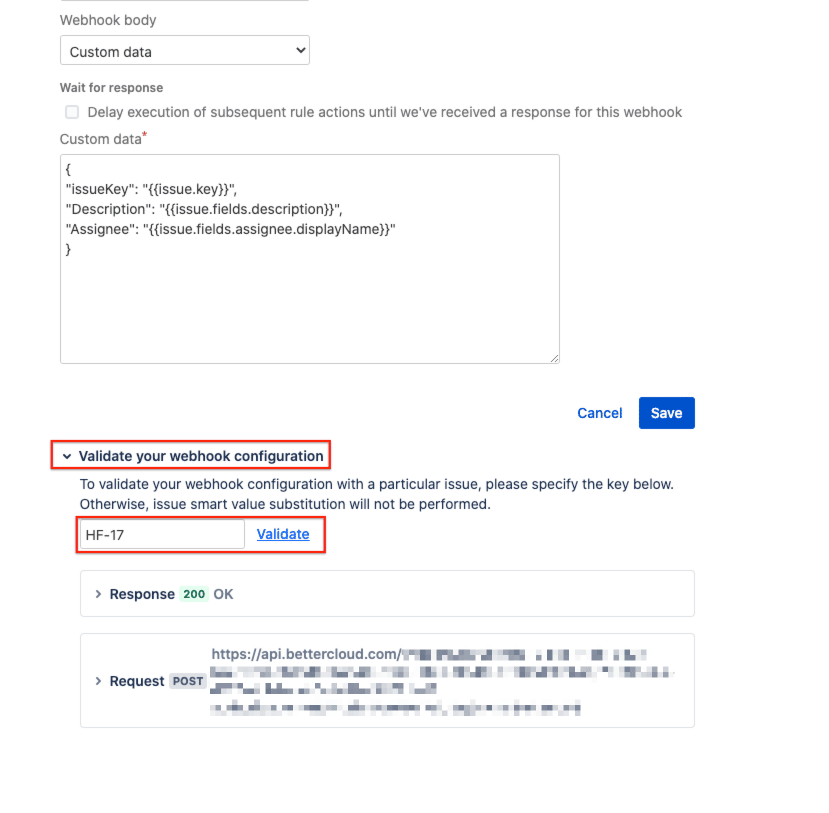
Paste the BetterCloud Trigger URL into the “Webhook URL” field in JIRA and change the HTTP method to be “POST.”
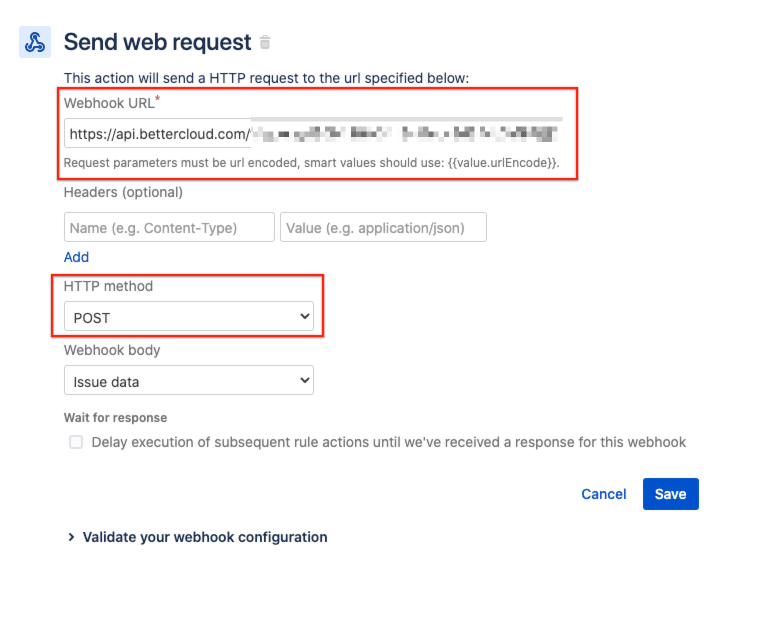
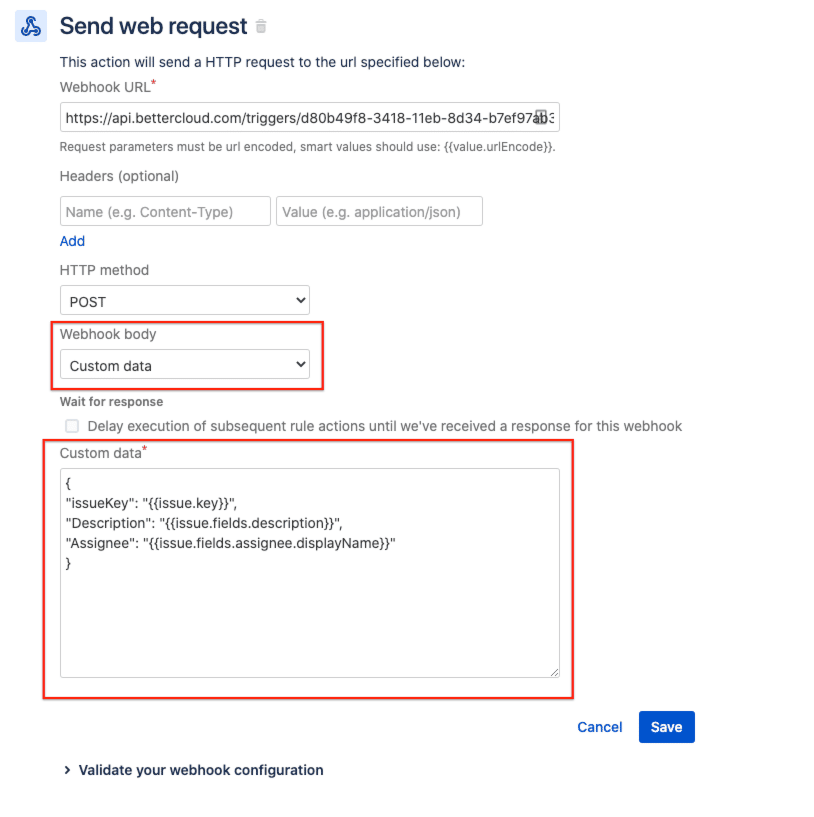
For the Webhook body, select either “Custom data” or “Issue Data”. This example will use “Custom Data”, but provide whichever data points you want passed from the ticket to BetterCloud using JIRA Smart Values. The data should adhere to standard JSON format.
Test your JIRA rule by selecting the “Validate your webhook configuration” dropdown and providing a sample Issue. Jira will then pull the selected fields from that issue and send them to BetterCloud.
[Pro Tip: If you include the Issue Key in your request, you can use it to write back to the ticket as part of your Workflow.]
If your test was successful, click “Save” and switch back to app.bettercloud.com. If your test was not successful, ensure you have followed the steps above correctly.
Step 3: Configure the custom trigger in BetterCloud
If the above steps were successful, BetterCloud will display the test as received. Click “Next: Configure Workflow Options”.

Click the “View Raw Data Response” field to view the format of the data that was sent to BetterCloud.
Select the target of your Custom Trigger. Typically something like a username or email makes sense in this target field. The easiest way to think about {target} is: “My Workflow just ran on {target}.”
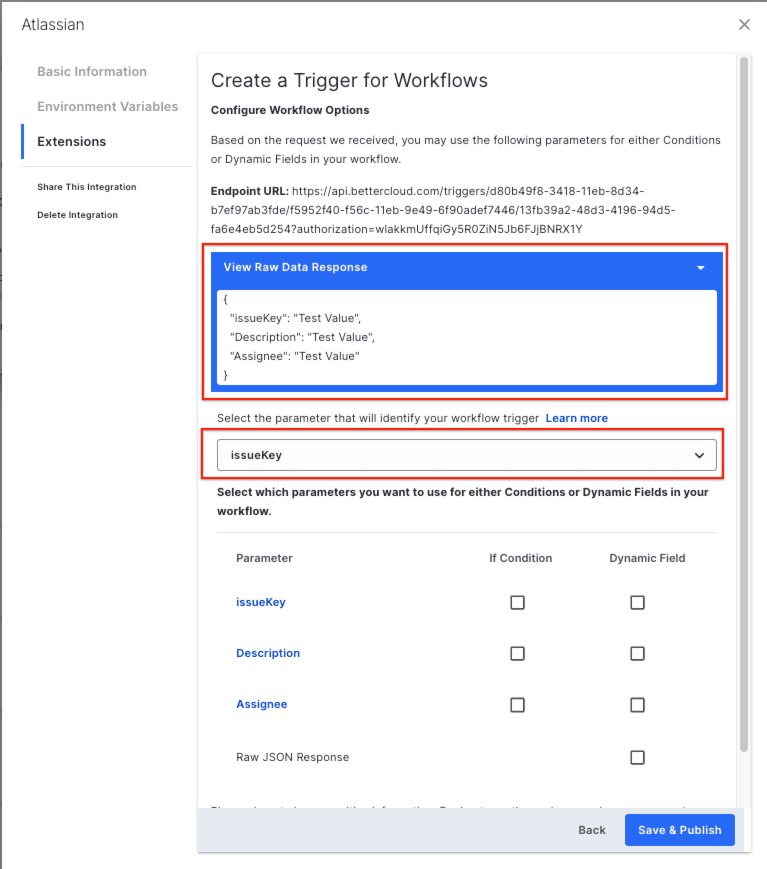
Select if any parameters should be exposed as If Conditions or Dynamic Fields in the Workflow by checking the box next to the parameter. See our Custom Triggers article for a list of caveats related to If Conditions and Dynamic Fields.
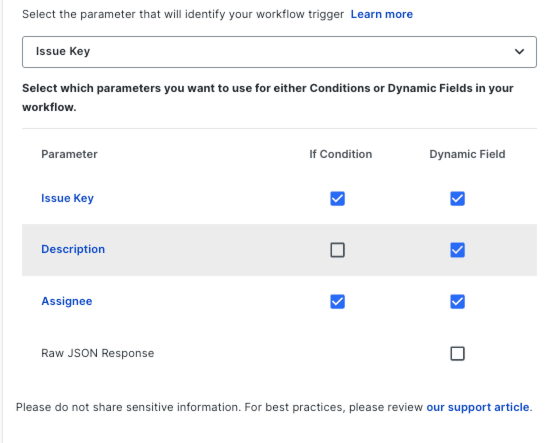
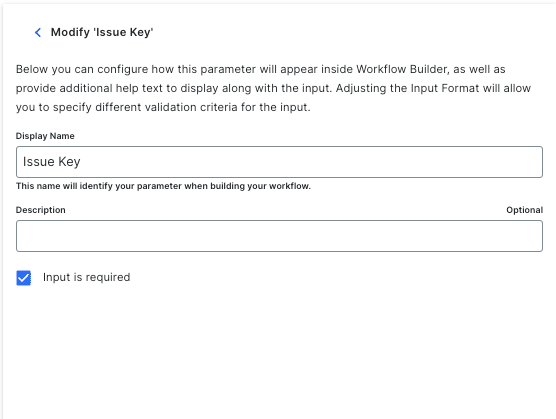
For any data points that should be required for the Workflow to trigger, click the parameter and check the “Input is required” box. If a trigger that is missing a required field is sent to BetterCloud, it will be rejected and an audit log will be generated.
Why make fields required? If a ticket is missing the user’s name, for example, it’s easier to catch missing data up front than it is to execute a full Workflows worth of actions and have them all fail because a critical data point is missing.
After you’ve configured your parameters, Save and Publish your Custom Trigger and head over to Workflows builder to begin using your Trigger!
Step 4: Build and test your workflow
Once you’ve built a Workflow around this new Custom Trigger, you can begin to run a full test. Before you start, be sure your Jira Rule is enabled in Jira and your BetterCloud Workflow is published. Then navigate to your Jira board and trigger the evaluation criteria you specified (create a new issue, transition and issue, etc) and watch your new automation come to life.
What’s Next
If you’re a BetterCloud customer with the Platform API, Custom Triggers are available for you to use.
Additional customization within the BetterCloud API can support custom triggers, custom action, and push events.
P.S. Custom triggers were a topic from a previous InFlight session! Check out the recording here.
Not familiar with InFlight? InFlight is a monthly exclusive customer live stream series to delve deeper into BetterCloud. You can check out all the videos here. (as well as register for the next one!)
BetterCloud is the leading SaaS Management Platform (SMP), helping leading IT organizations discover, manage, and secure their SaaS applications. To learn more, request a demo.