
Modify and Customize the AutoCorrect in Word
2 minute read


While many of us are familiar with the spelling and grammar check that Word offers, we don’t always give the AutoCorrect feature the attention it deserves.
When you forget to hold down the shift key to capitalize the first letter of a new sentence, but it happens automatically? That’s AutoCorrect. When you type “teh” and it immediately converts to “the”? That’s AutoCorrect.
You can add to, modify, and remove some of the automatic actions that AutoCorrect takes. Follow the instructions in the video above, or:
- From the File tab, select Options.
- Select Proofing.
- Click AutoCorrect Options.
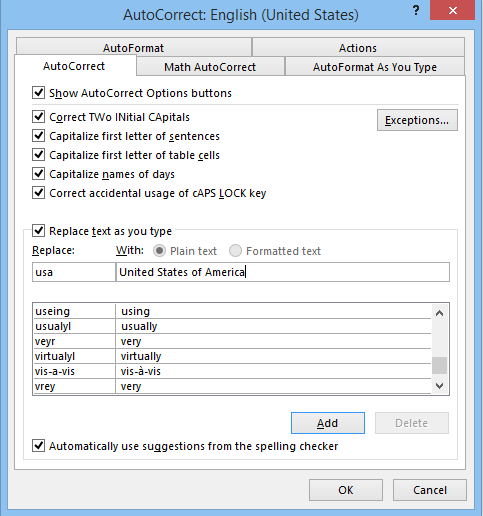
- From here, you can check or un-check the boxes next to the automatic functions of AutoCorrect, or you can modify the “Replace text as you type” list by selecting an entry and clicking Add, Delete, or changing the text and clicking Replace.
- Click OK.
The “Replace text as you type” list automatically corrects typos and misspelled words, like the aforementioned “teh” into “the.” It also changes words into symbols, and can even act as a way to insert a long piece of text without typing out the entire thing. For example if I want “United States of America” to be entered whenever I type “usa,” I would put the first term in the right-hand column and “usa” on the left, click Add, and then click OK.
According to Microsoft, “The AutoCorrect list is global across the Microsoft Office programs that support this feature, which means that when you add or delete a word from the list in one Microsoft Office program, the other Office programs are also affected.” Keep that in mind when you’re making these changes in Word.


