
How to Add Individual Office 365 Users
2 minute read


Adding new users can be a daily task for some admins, depending on the size of the organization. With Office 365, you’ll find a variety of ways to add new users to your tenant. One of the simplest ways is to use the admin center, where you can add users individually or bulk (via a CSV file).
The video above shows you how to add individual users in the admin center.
 The steps are simple:
1. Sign in to Office 365 and go to the admin center.
2. Under Users, select Active Users.
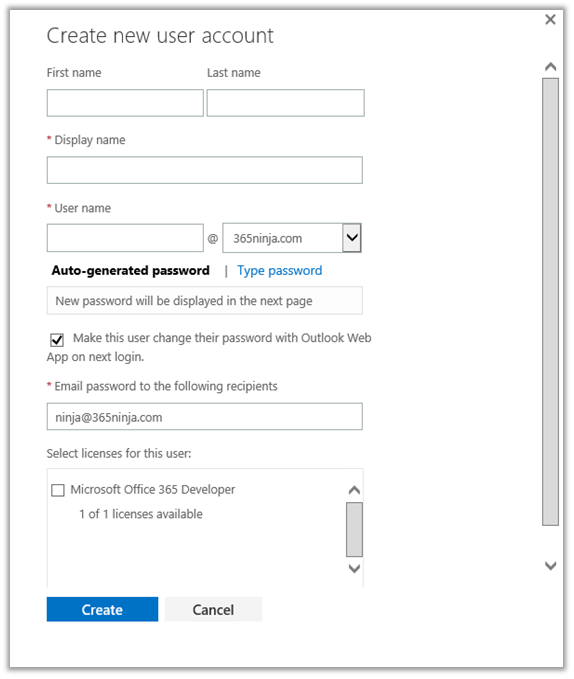
3. Click the + icon and the Create new user account page will be displayed
4. Enter a display name and and user name. The user name is what the new user will use to sign in to Office 365.
5. Select the domain for the user in the drop-down menu.
6. Auto-generate a temporary password for the new user, or create a different temporary password by selecting Type password. The user will need to change their temporary password within 90 days.
7. In the Email password to the following recipients field, enter the email address(es) of the individual(s) who should receive the new password.
8. Select a license for the new user.
9. Click Create to create the new user account, and an automated email will be sent.
10. Be sure to communicate the new sign in information and password to the new user.
Tip: if you need to reassign, remove, or otherwise edit the user’s license assignment, you can easily do that in the admin center too. Check out our next post, Assign or remove Office 365 user licenses.


