
3 Ways to Automate Email Tasks Using Gmail
June 20, 2016 / / Comments Off on 3 Ways to Automate Email Tasks Using Gmail
3 minute read


The average worker spends 13 hours a week reading, deleting, sorting, and sending emails. That’s a pretty big chunk of time! Luckily, you can recoup some of that time using the power of automation. By automating tedious email tasks, you can save time, boost productivity, and stay organized. Here are three easy ways to automate tasks right within Gmail.
1. Use labels to automatically sort incoming messages
Rather than manually sort through emails and assign labels, you can automatically apply labels to incoming messages based on different criteria.
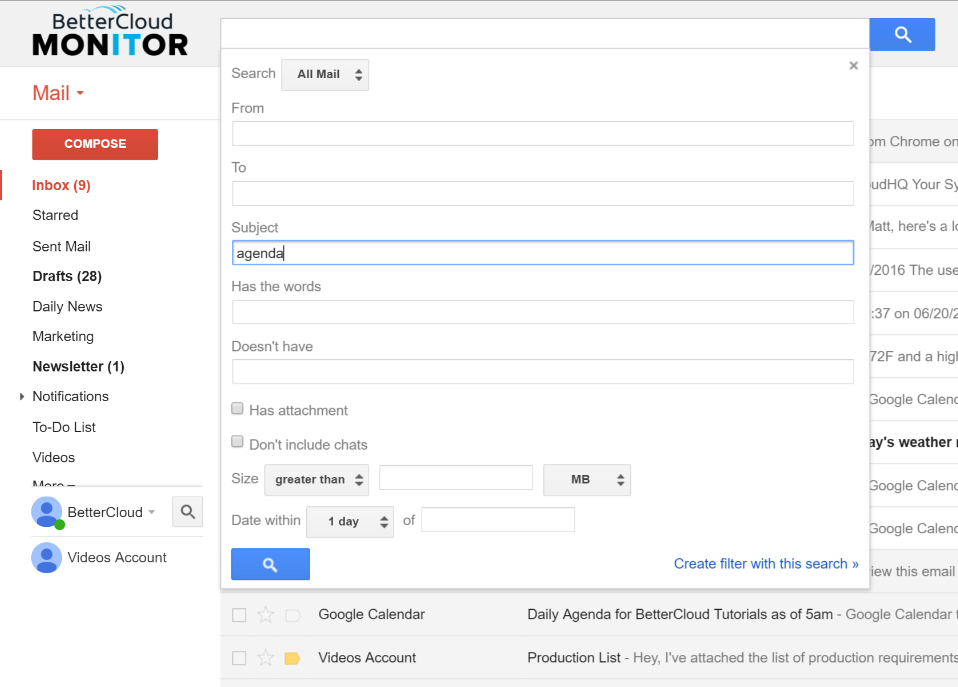
- First, click on the dropdown arrow in the search bar at the top of your Gmail screen.
- As you can see, you can label messages based on the subject, sender, certain words, attachments, or date. For this example, we’ll label all emails containing the word “agenda” in the subject line. Type “agenda” into the subject line, and then click “Create filter with this search.”
- Check the box “Apply the label,” and in the dropdown menu, click “New label.”
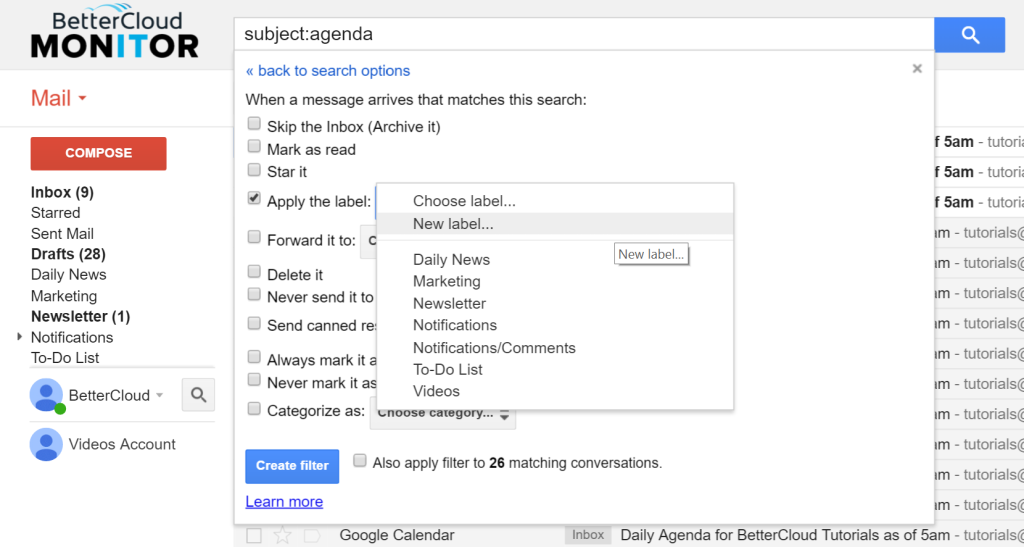
- Type in “agenda.” Click “Create” and then “Create filter.”
- Now, any new incoming messages containing “agenda” in the subject line will be automatically filtered and labeled, and you can just click the label to read all of your agenda-related messages. You can set up these automatic labels for as many subjects or senders as you want, allowing you to sort your email with a fine degree of precision.

2. Use filters to automatically forward emails, mark an email as read or important, and more
For example, if someone emails you with a request for a meeting in the subject line, you might want the email to be forwarded to an assistant and then marked as read in your inbox, so that you don’t have to worry about the scheduling particulars.
- To do this, click the dropdown arrow in the search bar at the top of your Gmail screen.
- Type in “meeting” in the subject line, and then “Create filter with this search.”
- Check the “Forward it to” box, insert the forwarding address, and then check “Mark as read” as well.
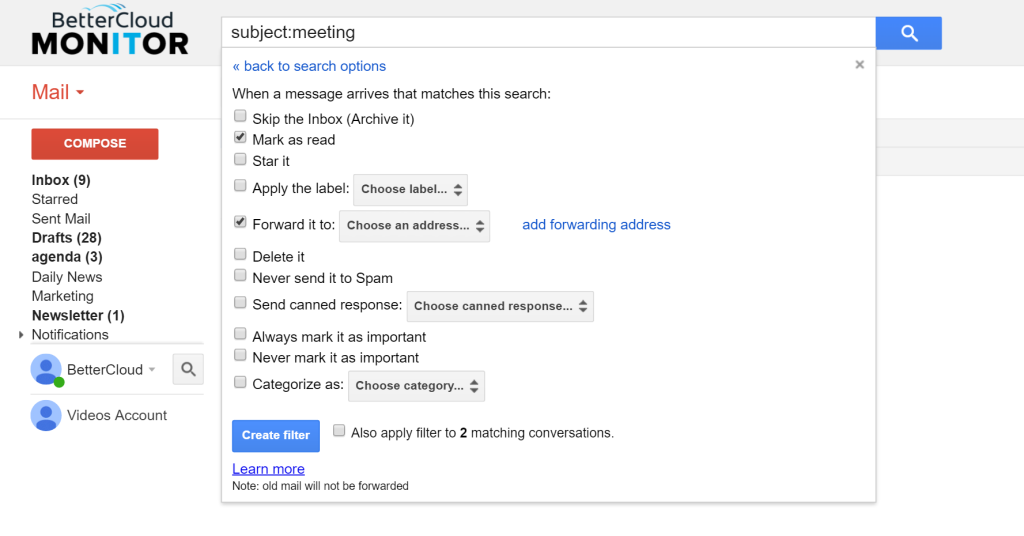
- Now, any incoming messages containing “meeting” in the subject line will be automatically forwarded to the person of your choice and also marked as read in your inbox.
3. Use Canned Responses to send pre-written/saved responses
Finally, let’s look at the Canned Responses lab, which allows you to quickly fire off form responses that you can use as blanket answers to certain types of emails.
- First, we have to enable the lab. Go to the gear icon in the upper right-hand corner of the screen > Settings.
- Select Labs. Find the Canned Responses lab and click Enable. Scroll down and click Save Changes.
- Head back to your Gmail window. Now, compose a message that you might use frequently, like “Thanks very much for this! I’ll get back to you as soon as I can.” To set up a canned response, click on the dropdown arrow in the lower right-hand corner of the Compose window, and choose Canned responses, followed by New canned response. You’ll have to name the response and save it to make it available.
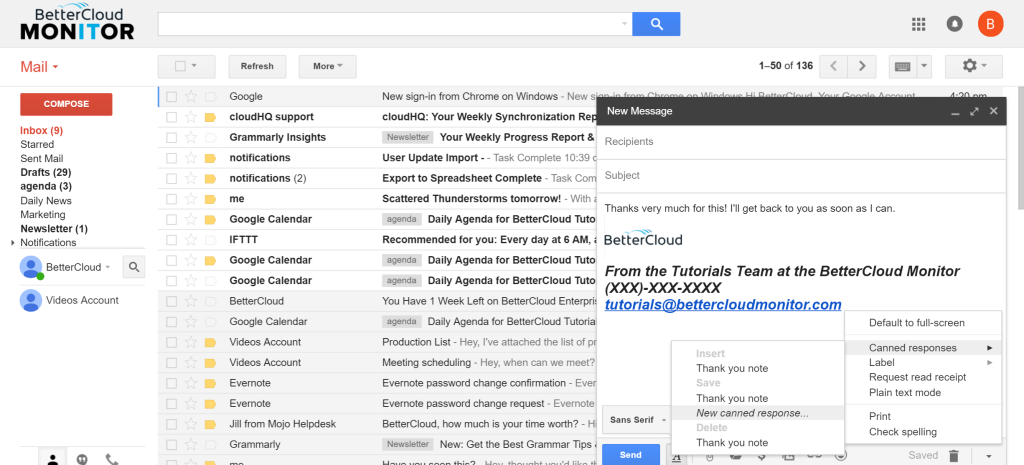
- Now, when you receive an email and click reply, you can just click the dropdown arrow in the lower right-hand corner > Canned responses > choose the response you created. Just like that, you can reply to an email in a few clicks without ever having to write anything!


